I was given an old guitar neck a few years ago. It was covered in dirt and dust, and had obviously been sitting around for quite a while. It had no maker or other identifying marks on it.
I hung it on a wall in my studio, and every so often, I would look it over for a bit, and then go back to whatever projects were already in progress. I guess I had wanted to create a lamp from a guitar neck, even before this one came to me, but I just never seemed to get around to it.
Then came the pandemic, and with it, isolation. A month or so into the spring 2020 lockdown, I found myself with an empty work table and looking again at that guitar neck. I then got it off of the wall, and began my mostly organic process of design visualization – trying different looks and concepts with materials on hand to see where they might lead, as well as making a few preliminary sketches.
When a rough concept had been decided on, I made notes and more sketches of my vision of the completed artwork. With this project, I needed a lamp base, and a lower body to serve as a mount for the guitar neck. I also needed to design the lamp structure and decide how it would integrate with and enhance the main visual component, including the not-yet designed lighting components and lampshade. With more tryouts, sketches etc., a more complete picture of the lamp structure, sockets and other components began to come together. This more complete picture of the dimensions of the finished lamp allowed me to begin to finalize the design of the lampshade shape, diameter and height – fabric choice would come later.
Once I was satisfied with the basic design, work began on shaping the lower body section, which would hold the guitar neck and the main lamp structure for the lighting element and lampshade up top. The lower body chosen was a block of western red cedar, or some other softer wood. I used an oscillating multi tool to cut a section out of one face that would serve as the mount for the neck. I also had to “square up” the top and bottom of the block. Eventually, I cut a veneer from the side of another block and glued it to the top. In addition to the cuts made for fitting the guitar neck, the block had to be drilled in several places to allow for mounting of the main lamp hardware, as well as wiring and mounting to the metal base.
While the block finishing was taking place, work began on the neck itself. This involved two different processes: finish and engineering. First, the old finish had to be stripped and sanded off the neck and fingerboard. Next, mounting the neck to the base block had to be designed and implemented.
The switch was to be mounted in the fingerboard. Holes were drilled, and a mounting system was devised. Additional holes were drilled in the base block for the passage of wiring to the switch.
The unfinished neck and base block were assembled and final design details were completed for mounting the lamp pipe, both in the base block and through the headstock, as it will pass through the headstock from back to front. The lamp pipe had to be bent with a modified “S” shape at the correct height to pass through the headstock. Once the bend was completed, angle measurements were taken in order to ensure the hole drilled through the headstock would be at the proper angle.
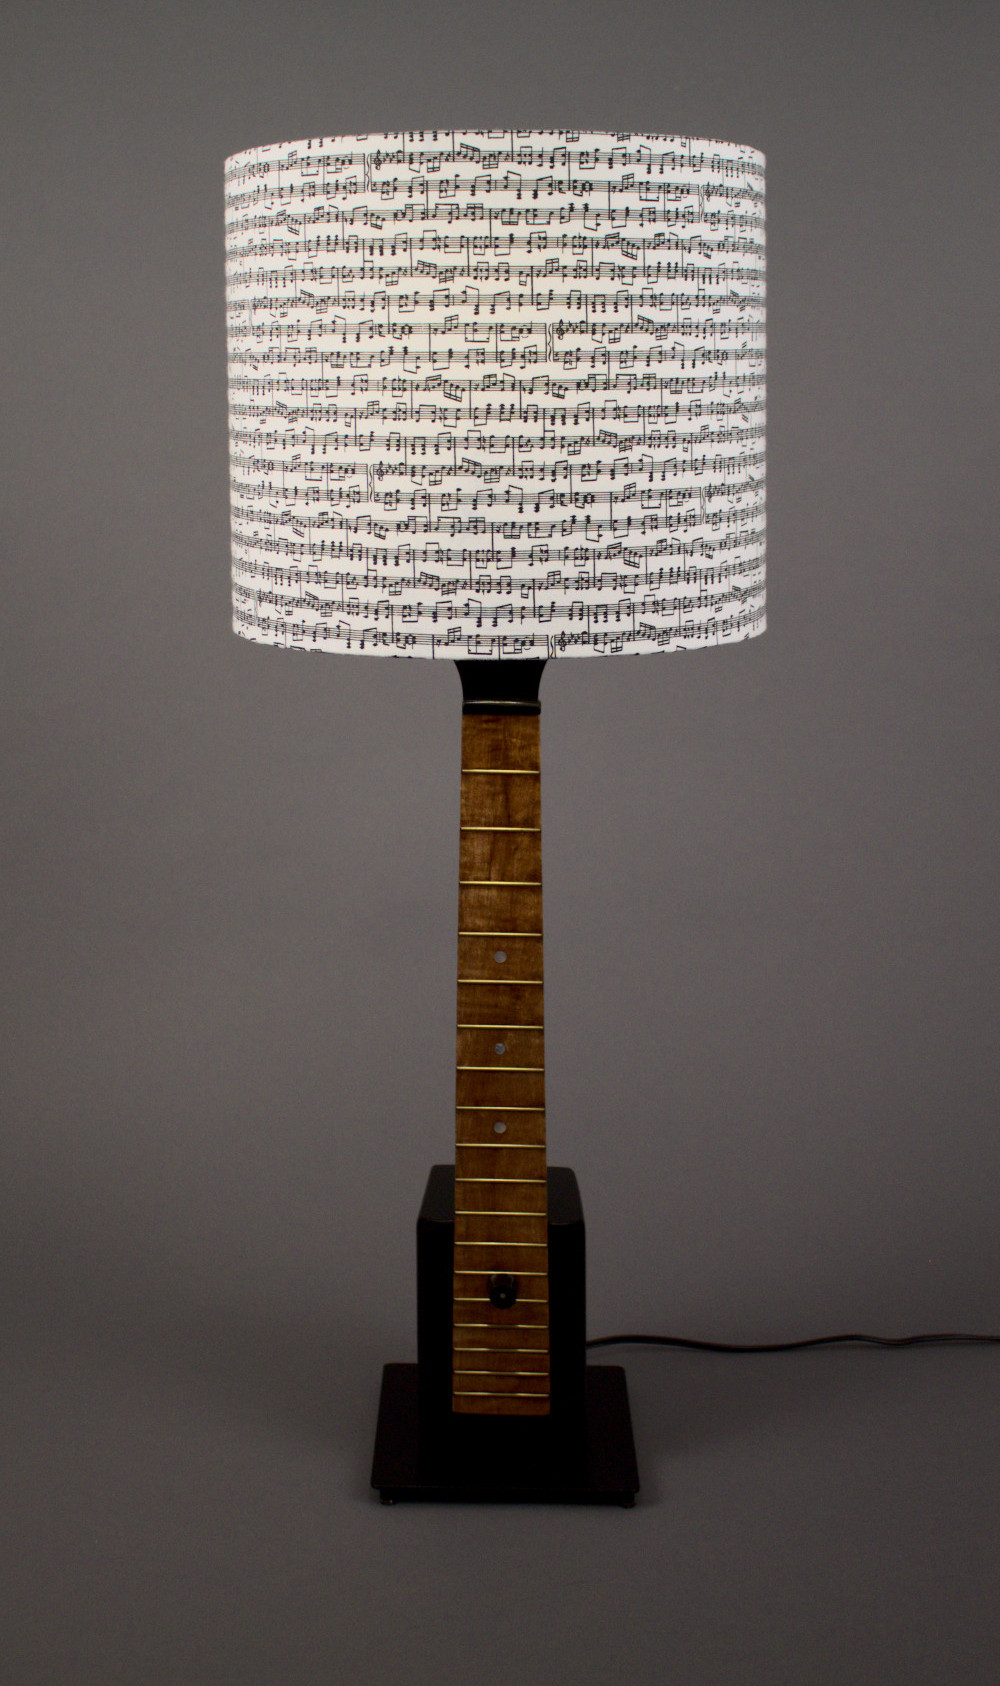
The 2-bulb lighting assembly was upcycled from a ceiling fan light fixture. The horizontal orientation of the light bulbs allowed for proper vertical positioning of the lampshade, as well as providing nice uniform illumination.
Finishing. Three new Perl dots were inlaid into the fingerboard. Six pearl dots were inlaid into the peg head, in the holes where the tuning machines originally resided. A nut had to be created, as it was missing from the peg head end of the fingerboard. Much masking tape was added, and painting began on the guitar neck. All visible areas of the neck with the exception of the fingerboard received many coats of gloss black lacquer. The fingerboard was left natural, and received only clear lacquer which was sprayed over the entire neck and fingerboard. The cedar block supporting the neck was similarly finished in black lacquer followed by clear lacquer.
Lampshade. A drum shade had been decided on in the earlier stages. A suitable fabric design was chosen and cut, and the lampshade styrene was cut and affixed to the fabric. The lampshade was then built on the wire lampshade rings.
Final assembly. Wiring was installed in the lamp pipe pieces, and connected to the sockets. Wiring connections were made in the bottom of the lamp block, in cavities created by earlier drilling. Once the wiring was done and tested, the finished pieces were very carefully assembled into the completed lamp.


©Bill Paine 2024